

Are you experiencing milky oil in your engine? This can be a sign of a serious problem, as it indicates that coolant has mixed with your oil.
If left unaddressed, this can cause significant damage to your engine and may even render it inoperable.
However, with quick action and the right steps, you can flush milky oil from your engine and get back on the road to freedom.
So, How To Flush Milky Oil From Engine?
To flush milky oil from your engine, start by draining the old oil completely. Next, add fresh oil along with an engine flush solution. Run the engine for 10-15 minutes, allowing the flush to break down contaminants. Finally, drain the mixture and replace it with new oil.
Table of contents
What Is Milky Oil in Your Engine?
Did you know that if you have milky oil in your engine, it’s a sign of trouble and you need to take action ASAP? Milky oil in your engine is usually caused by water mixing with oil.
This can happen for a variety of reasons, including a blown head gasket, a cracked engine block, or even just condensation buildup. The effects of milky oil can be severe, causing damage to your engine and reducing its overall lifespan.
Prevention Methods for Milky Oil:
Prevention methods for milky oil include regular maintenance of your vehicle, such as checking your coolant levels and changing your oil at recommended intervals.
Identifying symptoms early on can also prevent further damage, such as noticing a drop in oil pressure or a strange smell coming from your engine.
If you do notice any symptoms of milky oil, it’s important to seek professional help right away to prevent further damage to your engine.
If you do find yourself with milky oil in your engine, there are maintenance tips you can follow to flush it out.
This includes draining the oil and replacing it with fresh oil, as well as adding an engine flush product to help clean out any residue.
Why is My Car Oil Milky?
Moisture can accumulate in the internal components of your vehicle’s lubrication system, causing a creamy appearance in the fluid. This phenomenon is known as milky oil, and it can be a sign of serious engine problems.
Understanding the causes of milky oil can help you prevent further damage to your engine and keep your vehicle running smoothly.
Condensation:
One of the most common causes of milky oil is condensation. When your engine is not running, moisture can build up in the crankcase, mixing with the oil and causing it to turn milky.
Low Oil Pressure:
Other common symptoms of milky oil include low oil pressure, engine overheating, and a burning smell from the engine. If you notice any of these symptoms, it’s important to get a professional diagnosis right away.
Preventive measures can help you avoid milky oil and other engine problems. Regular oil changes are essential to keep your engine running smoothly, as old oil can become contaminated and lose its lubricating properties.
In addition, proper maintenance practices such as checking your engine’s coolant level and keeping it topped off can help prevent condensation from forming in the first place.
With these simple steps, you can help ensure that your engine stays in top condition and runs smoothly for years to come.
| Common Symptoms | Preventive Measures | Professional Diagnosis |
|---|---|---|
| Milky oil | Regular oil changes | Professional mechanic |
| Low oil pressure | Proper maintenance practices | Diagnostic tools |
| Engine overheating | Checking engine coolant levels | Visual inspection |
| Burning smell from engine | Addressing issues promptly | Physical examination |
Milky oil is a serious engine problem that should be addressed quickly to avoid further damage. Understanding the common causes of milky oil, as well as preventive measures and maintenance practices, can help you keep your engine in top condition.
By staying on top of your oil change frequency and addressing any symptoms promptly, you can help ensure that your vehicle stays running smoothly and reliably.
How to Flush Milky Oil from Engine?
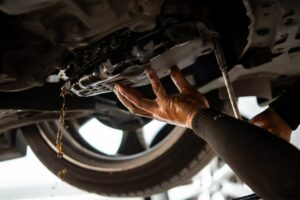
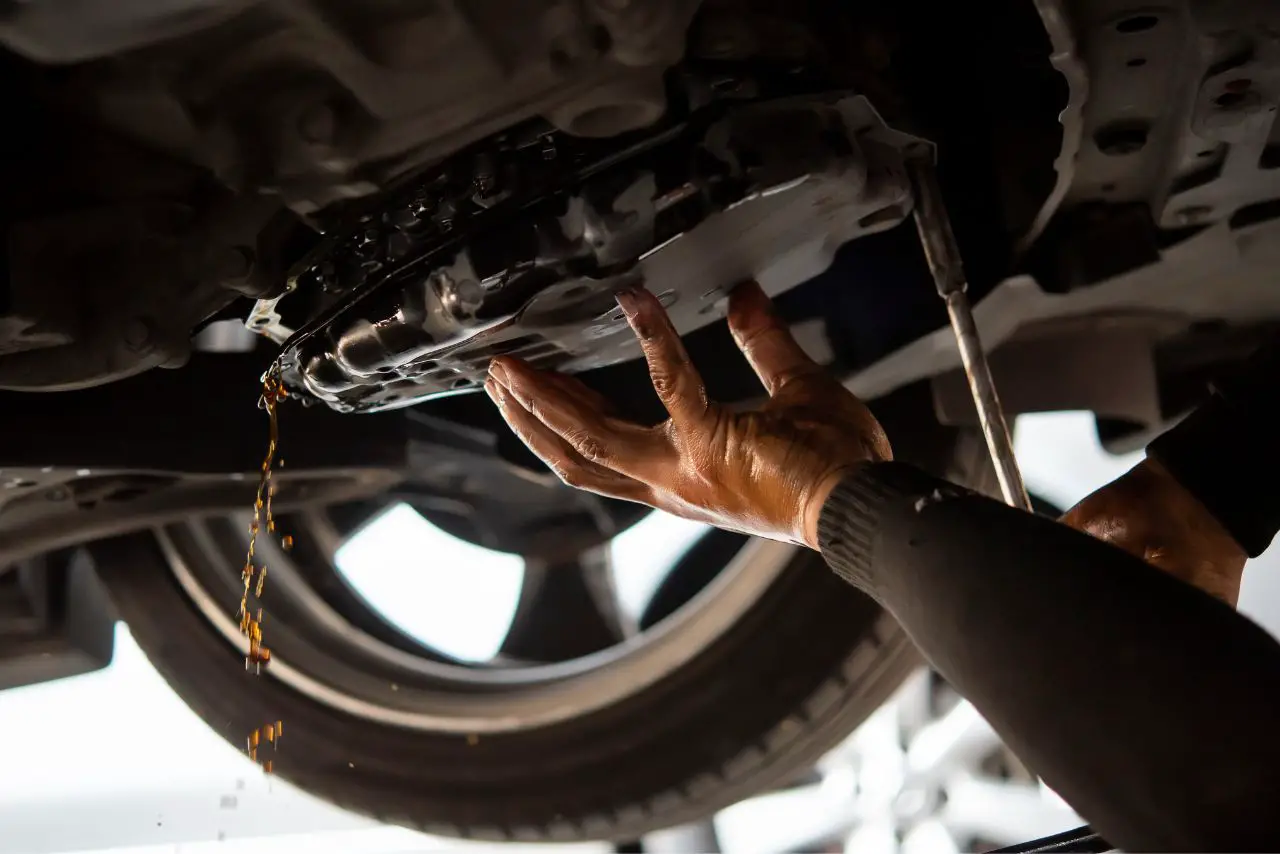
To flush milky oil from your engine, start by setting your car on a level surface and draining the oil.
Next, remove the oil filter and replace it with a new one. Fill your engine with clean oil, and check for any leaks.
This process is crucial to maintaining the health of your engine and preventing further damage.
Set Your Car And Drain the Oil:
This is an important step in car maintenance as improper oil disposal can harm the environment. Now you’re ready to move on to the next step of engine flushing.
Remove Your Oil Filter:
Next up, it’s important to remove your oil filter before flushing your engine. Here’s what you need to know:
Remember, replacing your oil filter is an essential part of engine maintenance. Avoid DIY fixes and take your car to a professional mechanic if you’re not sure how to do it properly.
By following these simple steps, you’ll ensure that your engine is running smoothly and efficiently.
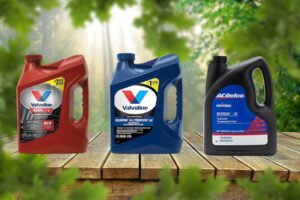
Fill Your Engine with Clean Oil:
Now it’s time to top off your vehicle with fresh, clean oil to keep your engine running smoothly.
After removing the old oil filter and draining the milky oil, it’s important to refill the engine with clean oil that meets the manufacturer’s recommended specifications.
Here are some basic steps to follow for an oil change and engine maintenance:
| Oil Change Steps | Lubrication Basics |
|---|---|
| 1. Choose the right type of oil | – Oil lubricates engine components, reducing friction and wear |
| 2. Locate the oil fill cap | – Oil also helps cool the engine by absorbing and dissipating heat |
| 3. Add the recommended amount of oil | – Regular oil changes help remove contaminants and debris that can damage the engine |
| 4. Check the oil level with the dipstick | – Proper oil disposal is important to protect the environment |
Replace Your Oil Filter:
To keep your car’s vital systems running smoothly, it’s important to swap out your old, dirty oil filter for a fresh one on a regular basis. The oil filter is responsible for trapping debris and contaminants that can damage your engine over time.
Without proper installation and regular maintenance, a clogged oil filter can cause milky oil to circulate throughout your engine, leading to poor performance and potential damage.
Oil change intervals vary depending on your vehicle and driving habits, but it’s recommended to replace your oil filter every time you change your oil.
It’s important to choose quality filters to ensure maximum protection for your engine.
Synthetic oil also offers benefits, as it can reduce the amount of contaminants and wear on your engine, ultimately extending the life of your oil filter.
Check If there are any Leaks:
Don’t overlook the importance of checking for leaks – it could save you from a costly and frustrating breakdown.
Before flushing milky oil from your engine, it’s important to inspect your engine and surrounding areas for any leaks.
Here are some leak detection methods to help you troubleshoot and repair any leaks:
By checking for leaks before flushing milky oil from your engine, you can prevent future leaks and costly repairs.
If you do identify any leaks, make sure to repair them before flushing your engine.
Once you’ve repaired any leaks, you’ll have peace of mind knowing that your engine is running smoothly.
Importance of Acting Quickly:
Acting quickly is crucial when it comes to flushing milky oil from your engine. The longer you wait, the more damage it can cause to your engine.
When you notice that your oil has turned milky, it means that there is water mixed in with the oil.
This can be a sign of a serious problem such as a blown head gasket or a cracked engine block. Quick response can help minimize the damage and prevent further complications.
Preventive measures are always better than reactive solutions. Regular engine maintenance and oil change frequency can prevent the buildup of water and oil mixtures in your engine.
Make sure to follow the recommended oil change schedule for your car to keep your engine in good condition. If you suspect that there is a problem with your engine, don’t hesitate to seek professional help. A mechanic can diagnose the problem and provide the necessary repairs to prevent further damage.
Flushing the Engine with Clean Oil:
To keep your car running smoothly, you should regularly replace the old oil with fresh, clean oil to ensure that any contaminants are removed from the internal components.
However, if you notice milky oil in your engine, it means that there is water or coolant mixed with the oil. This is a sign of a serious problem and requires immediate action.
Oil flushing is the process of removing all the old oil and contaminants from the engine and replacing it with fresh, clean oil.
This is an essential step in engine maintenance as it ensures proper lubrication of the internal components and prevents damage due to wear and tear.
The lubrication system is responsible for keeping the engine running smoothly, and any contaminants in the oil can cause a drop in engine performance.
During oil flushing, it is important to use a high-quality engine flush that is specifically designed for the type of engine in your car.
This will ensure that all the contaminants are removed from the engine and the fresh oil can do its job properly.
After the oil flushing process is complete, make sure to follow the manufacturer’s recommendations for oil changes to maintain the engine’s performance and longevity.
Replacing the Oil Filter:
Replacing the oil filter is a crucial step in regular car maintenance that should not be overlooked. When selecting an oil filter, it’s important to choose one that is compatible with your vehicle’s make and model.
You should also consider the filter’s efficiency rating and whether it meets the manufacturer’s specifications.
The frequency of oil filter replacement varies depending on the type of vehicle and the driving conditions.
As a general rule, it’s recommended to replace the oil filter every time you change the oil. This ensures that the filter is always working at maximum efficiency and helps to prevent engine damage.
While DIY oil filter replacement can save you money, it’s important to ensure that the job is done correctly. Common mistakes to avoid include using the wrong size filter, forgetting to lubricate the gasket, and overtightening the filter.
Professional filter replacement may be a better option for those who are not experienced with car maintenance. Using high quality filters can also provide benefits such as better filtration and improved engine performance.
Repairing Underlying Issues:
If you notice any unusual sounds or vibrations while driving, you should have a professional mechanic inspect your vehicle to determine if there are any underlying issues that need to be repaired.
Identifying issues early on can prevent major problems from occurring down the line.
Some common causes of milky oil include a blown head gasket or a cracked engine block. These issues can lead to coolant leaking into the oil system, resulting in the milky appearance of the oil.
Preventative maintenance is key to maintaining engine health and avoiding milky oil. Regularly checking the oil and coolant levels can help you catch any potential issues early on.
Additionally, having your vehicle serviced at recommended intervals can help prevent issues from arising in the first place. It’s important to keep in mind that neglecting regular maintenance can lead to costly repairs in the long run.
If you suspect that there are underlying issues causing milky oil in your engine, it’s important to seek the help of a professional mechanic. Attempting to fix the issue yourself can lead to further damage and potentially costly repairs.
| Common Causes of Milky Oil | Possible Solutions |
|---|---|
| Blown Head Gasket | Replace head gasket |
| Cracked Engine Block | Repair or replace engine |
| Coolant Leaking into Oil System | Replace affected parts and flush system |
| Neglected Maintenance | Regularly service vehicle and check oil and coolant levels |
Frequently Asked Questions:
What are the potential long-term effects of leaving milky oil in your engine?
Leaving milky oil in your engine can lead to corrosion damage, reduced engine performance, and the need for more frequent oil changes.
Preventive measures include identifying and addressing contaminant sources, as well as regular maintenance.
Can milky oil occur in engines that are regularly maintained and serviced?
Milky oil can occur in regularly maintained engines if preventative measures are not taken. Common causes include water contamination, inadequate ventilation, and allowing the vehicle to sit for extended periods.
Proper maintenance and early detection can prevent milky oil. Professional solutions may include engine flushing and repair.
Are there any DIY methods for flushing milky oil from an engine?
To flush milky oil from your engine, DIY methods include an oil change, using a flushing oil additive, or a vinegar and water solution.
Prevent engine damage by regularly maintaining and servicing your vehicle, or seek professional services.
How often should you check your engine oil for signs of contamination?
To ensure optimal engine performance, it is important to regularly check your oil for signs of contamination.
How often you should check depends on your vehicle and driving conditions. Neglecting this task can lead to costly repairs.
Is it safe to continue driving your vehicle if you notice milky oil in the engine?
If you notice milky oil in your engine, it’s not safe to continue driving. Common causes include coolant mixing with oil.
Prevention methods include regular oil change frequency. Repair costs vary but may require professional flushing services.
Conclusion and final thoughts 💭
Congratulations! You now know how to flush milky oil from your engine like a pro. Remember, milky oil is a sign of contamination, and it can cause serious damage to your engine if left unaddressed. Acting quickly is crucial to prevent further damage to your vehicle.
To flush milky oil from your engine, you need to drain the contaminated oil, flush the engine with clean oil, replace the oil filter, and repair any underlying issues.
Don’t forget to use high-quality oil during the flushing process and dispose of the contaminated oil properly.
By following these steps, you can ensure that your engine runs smoothly and efficiently for years to come. Keep your vehicle in top shape by taking care of it regularly and addressing any issues promptly.
Latest Posts:
- 10 Best Gear Oil for Limited Slip Differentials (Reviewed!)

- Allison 1000 Transmission Fluid Type (5 Best Options!)
- 91 Octane Vs 93 Which One You Use? (The Surprising Truth!)

- Oil Pressure Gauge Not Working: (Guaranteed Fix!)

- 10 Best Transmission Fluid for 4l60e (Tested by Experts!)
- 10 Best Ceramic Coating For Wheels (Used By Real Users!)


Leave a Reply