
Are you tired of paying a mechanic to replace your brake lines every time they start to deteriorate? It’s time to take matters into your own hands and learn how to change your brake lines without losing any fluid.
Not only will you save money, but you’ll also have the satisfaction of knowing you accomplished the task yourself.
Changing Brake Lines Without Losing Fluid:
There is no way to completely change brake lines without losing any fluid, but there are a few things you can do to minimize the amount of fluid you lose:
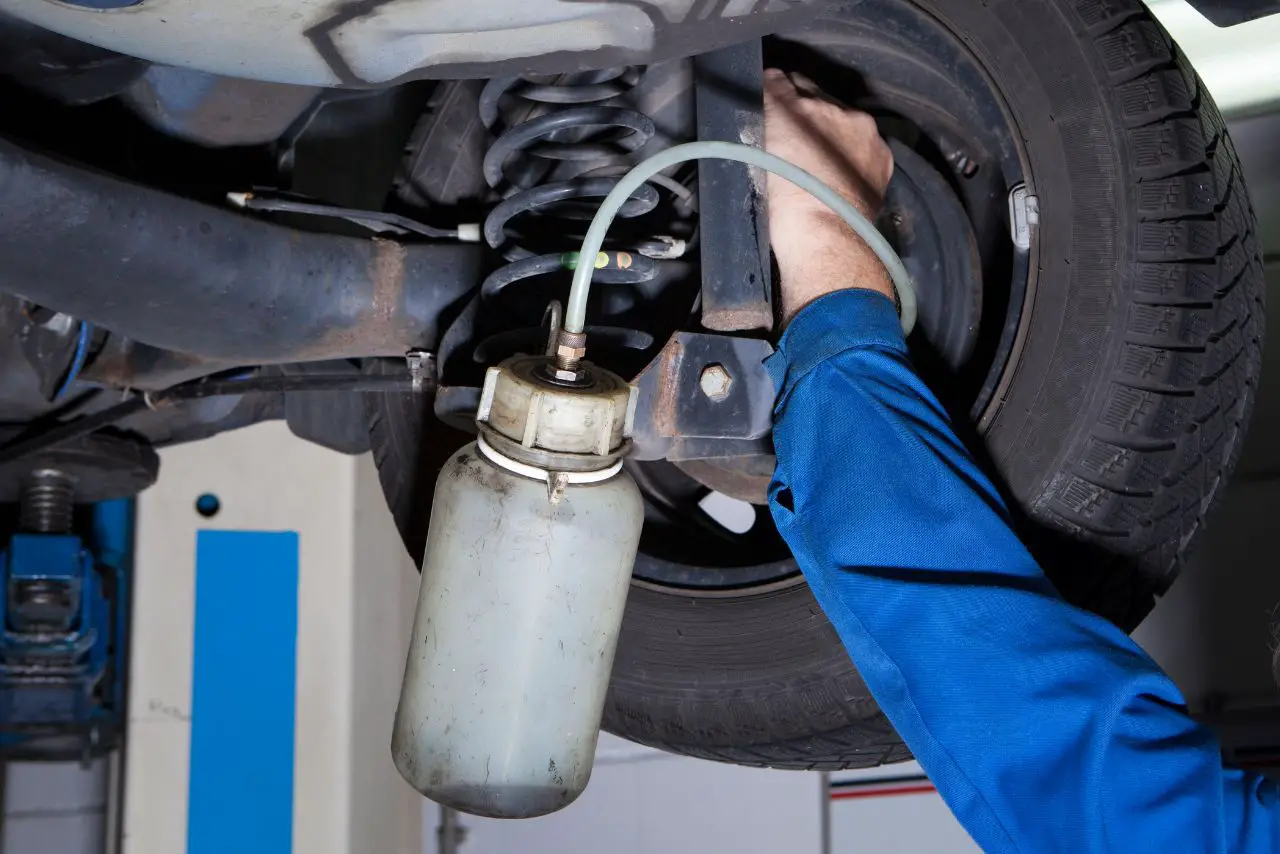
- Use a brake line clamp. A brake line clamp is a tool that can be used to temporarily close off a brake line. This will prevent fluid from leaking out when you disconnect the line.
- Have a helper. A helper can hold the brake line up and prevent it from draining while you disconnect and reconnect it.
- Work quickly and carefully. The longer it takes you to change the brake lines, the more fluid you will lose.
Here are the steps for changing brake lines without losing fluid, using a brake line clamp and a helper:
- Place the brake line clamp on the rubber part of the brake line.
- Have your helper hold the brake line up.
- Use a wrench to loosen the brake line fitting at the caliper or wheel cylinder.
- Once the fitting is loose, quickly remove it and hand it to your helper.
- Have your helper cap off the brake line fitting with a brake line cap.
- Install the new brake line and tighten the fitting.
- Remove the brake line clamp and brake line cap.
- Bleed the brakes.
Watch this video for detail:
Gather the Necessary Tools and Equipment:

You’ll need to gather all the necessary tools and equipment before you can proceed with changing the brake lines without losing any fluid.
Proper tool selection is essential to ensure that the job is done effectively and efficiently.
You’ll need a brake line wrench, a flare nut wrench, a tubing cutter, a tubing bender, a brake line flaring tool, a brake fluid drain pan, and a jack and jack stands.
When selecting your tools, make sure they are of the right size and fit your vehicle’s brake lines. The brake line wrench and flare nut wrench must be the correct size to avoid damaging the brake lines or fittings.
The tubing cutter and bender must be able to cut and bend the brake lines properly. The brake line flaring tool must be able to create a leak-proof seal on the brake lines.
Safety precautions must also be taken when gathering your tools and equipment. Ensure that your vehicle is parked on a level surface and that the parking brake is engaged.
Use jack stands to support your vehicle and never rely on the jack alone. Wear eye protection and gloves to protect yourself from brake fluid and other debris. Following these safety precautions will ensure a successful and safe brake line replacement.
Prepare Your Vehicle:
Remember to always take caution when working on your vehicle and wear appropriate safety gear.
Lift your car:

First, grab your jack and position it under the jacking point of your car to lift it up. This is an essential step in changing your brake lines without losing fluid. Here are four things to keep in mind when lifting your car:
It’s important to remember that car maintenance requires safety precautions, and lifting your car is no exception.
Take your time and follow these steps carefully to ensure a successful brake line change without any accidents.
With these precautions in mind, you can enjoy the freedom of knowing your car is in excellent working condition.
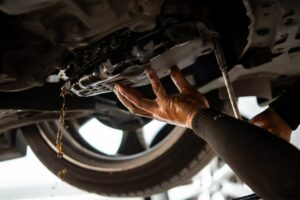
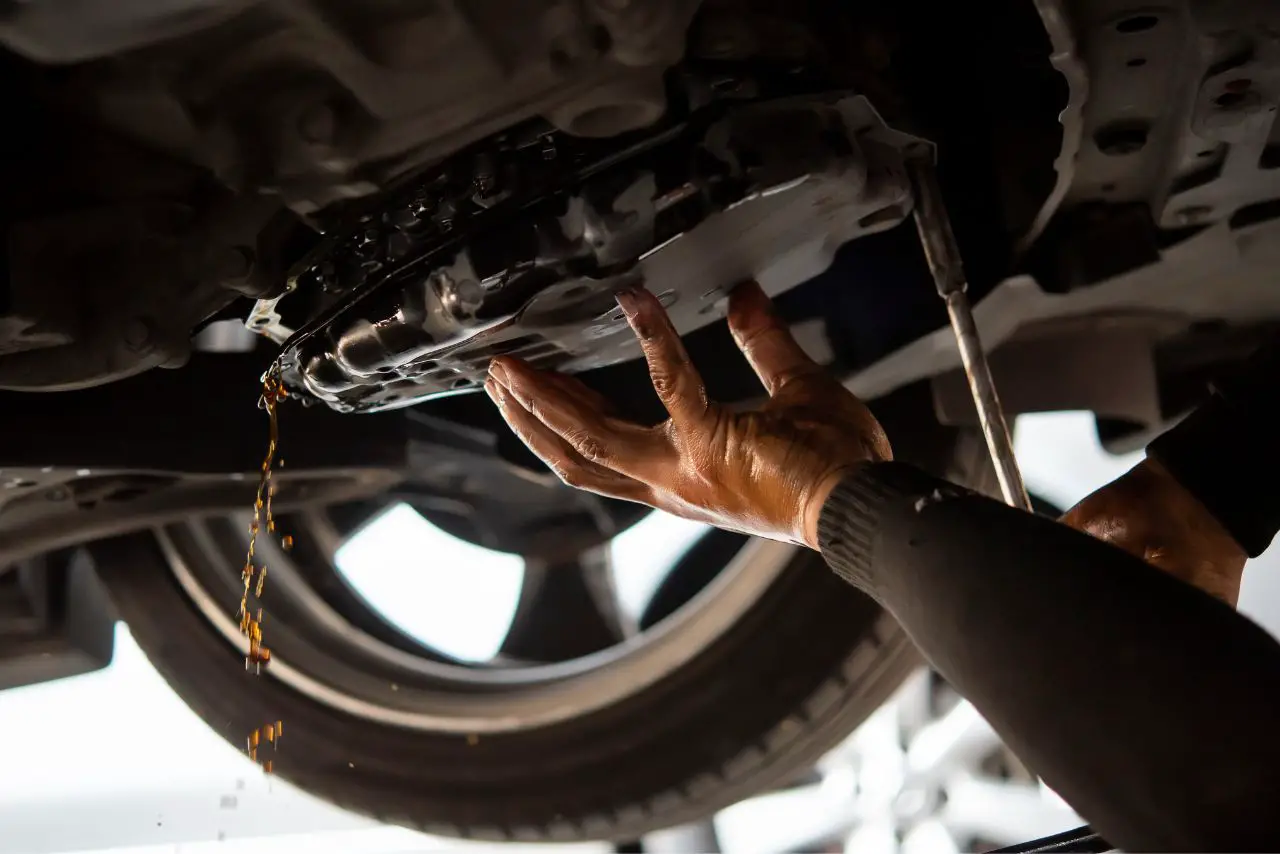
Remove old brake lines:

To remove those worn-out brake lines, start by loosening the fittings with a wrench. If the fittings are rusted and difficult to loosen, try spraying them with a penetrating oil to help break up the rust.
Once the fittings are loosened, use a line wrench to remove them completely.
After the fittings are removed, carefully remove the old brake lines from the car. Be sure to inspect the area where the fittings were attached for any signs of damage or wear.
If everything looks good, you can move on to replacing the brake line fittings with new ones. With the old lines removed and the new fittings in place, you’re one step closer to a safer, more reliable brake system.
Clean the area:
Now it’s time to tidy up the area by wiping down any dirt or debris with a clean rag, making sure the surface is ready for the new brake lines to be installed.
Before proceeding with the installation, it’s important to take necessary precautions to ensure safety and prevent contamination during brake line replacement. Here are some tips to keep in mind:
| Column 1 | Column 2 | Column 3 |
|---|---|---|
| Tip 1 | Always wear safety goggles and gloves to protect your eyes and hands. | Safety |
| Tip 2 | Use a brake cleaner or a non-residue cleaner to remove any oil or grease from the surface. | Cleaning Solutions |
| Tip 3 | Avoid using water or soap to clean the area, as it can contaminate the brake fluid. | Contamination Prevention |
| Tip 4 | Use a lint-free cloth to wipe the area clean, ensuring that no debris is left behind. | Cleaning Tools |
| Tip 5 | Double-check that the area is completely dry before installing the new brake lines. | Installation Preparation |
Remember, taking the time to properly clean the area can make a big difference in the performance of your brake system.
Using the right cleaning solutions and tools can prevent contamination and ensure that your new brake lines are installed correctly. Keep these tips in mind for a safe and successful brake line replacement.
Install the New Brake Lines:
Before you begin installing the new brake lines, make sure to clean the brake fittings thoroughly to prevent any debris from entering the brake system.
Once you have cleaned the area, it’s time to install the new brake lines. Start by threading the brake line into the brake fitting and tightening it with a wrench.
When tightening the connections, it’s important to use the proper torque settings to ensure a secure connection. Overtightening can lead to stripped threads, while under tightening can cause leaks. Use a torque wrench to tighten the connections to the manufacturer’s specifications.
As you install each new brake line, double-check your work to ensure everything is installed correctly.
Once you have installed all the new brake lines, it’s time to bleed the brakes to remove any air that may have entered the system.
By following these tips for tightening connections and using the proper torque settings, you can ensure a safe and effective brake system.
Bleed the Brake System:

Once the new brake lines are installed and tightened to the proper torque settings, it’s time to bleed the brake system to remove any air.
Bleeding the brake system is crucial to ensure that the brake pedal feels firm and that the brakes operate correctly. Here’s how to bleed the brake system:
First, fill the master cylinder with the correct brake fluid.

It is essential to use the manufacturer-recommended brake fluid to avoid damaging the brake system. Refer to the owner’s manual or consult a mechanic if you’re unsure which brake fluid to use.

Once you’ve filled the master cylinder, attach a clear plastic hose to the bleeder valve on the caliper or wheel cylinder.
Place the other end of the hose in a container that’s partially filled with brake fluid.
Next, have a helper press and hold the brake pedal.

Open the bleeder valve, and you should see a stream of fluid flowing out of the hose.
Tighten the bleeder valve and have your helper release the brake pedal. Repeat this process until there are no air bubbles visible in the container of brake fluid.
This process ensures that all the air is removed from the brake lines, which is essential to the brakes’ proper operation.
Common Mistakes to Avoid when Bleeding the Brake System:
Common mistakes to avoid when bleeding the brake system include not using the correct brake fluid and not following the proper bleeding sequence.
Using the wrong brake fluid can cause brake system damage or failure, while failing to follow the correct bleeding sequence can leave air in the brake lines.
Always refer to the owner’s manual or consult a mechanic for guidance, and take your time to ensure a complete and thorough brake system bleed.
Test Your Brakes:

Don’t forget to give your brakes a thorough test drive after bleeding the system to ensure they are working properly. Testing techniques are essential to make sure your brakes are performing optimally.
Start by testing your brakes in a safe and controlled environment. Choose an empty parking lot or a quiet street with little to no traffic.
Begin by testing your brakes at a low speed. Apply the brakes gently and check for responsiveness. Increase your speed gradually, and test your brakes at different speeds.
Pay attention to how your brakes feel. Do they feel spongy or firm? Do they vibrate or make any unusual noises? These are all signs that your brakes may not be performing as they should.
Test your brakes in an emergency situation. Slam on the brakes as if you were trying to avoid an obstacle. This will help you determine whether your brakes can stop your vehicle quickly and efficiently.
If you notice any issues with your brake performance during these tests, it’s important to address them immediately. Testing your brakes is crucial for your safety and the safety of others on the road.
Dispose of Old Parts and Brake Fluid:
Properly disposing of old brake parts and fluid is crucial to maintaining a safe and clean working environment for you and your vehicle. Here are some tips for safe disposal:
Not only is safe disposal important for maintaining a clean workspace, it also has an impact on the environment. Improper disposal of hazardous materials can lead to pollution of water sources and harm to wildlife.
By taking the extra step to dispose of old brake parts and fluid properly, you’re doing your part to protect the environment.
Remember, safety should always be a top priority when working on your vehicle. Properly disposing of old brake parts and fluid is just one part of ensuring a safe and efficient repair process.
By following these tips, you can help keep yourself and the environment safe while completing your repair.
Maintenance Tips for Your Brake System:
To ensure your brake system is always in top shape, there are some key maintenance tips you should follow.
By following these simple tips, you can help prevent potential brake issues and ensure your vehicle stops smoothly and efficiently every time.
Regularly check brake fluid level:
Make sure you keep an eye on your brake fluid level to ensure the proper functioning of your brakes.
The importance of brake fluid cannot be overstated as it is responsible for transmitting the force from the brake pedal to the brake pads, allowing you to stop your vehicle.
If the brake fluid level is too low, it can cause problems like reduced brake performance or even complete brake failure. Here are some ways to check the brake fluid level:
Keeping an eye on your brake fluid level is an easy and important maintenance task that can prevent potential accidents.
Regularly checking the brake fluid level and topping it up when necessary is a small step towards ensuring your safety on the road.
Remember, a properly functioning brake system is essential for your freedom to drive wherever you want, so take care of it.
Inspect brake lines for wear and tear:
When inspecting your brake lines for wear and tear, you’ll want to pay close attention to any signs of damage that could compromise your braking system.
Signs of corrosion, such as rust or flaking metal, can weaken the integrity of your brake lines and increase the risk of a brake failure.
If you notice any signs of corrosion, it’s important to replace the affected brake lines as soon as possible to ensure proper brake function and prevent potential accidents.
Additionally, it’s crucial to replace worn brake lines to maintain the safety and reliability of your vehicle.
Over time, brake lines can become worn due to exposure to heat, moisture, and road debris. Worn brake lines can lead to decreased brake performance, longer stopping distances, and even complete brake failure.
Regularly inspecting and replacing your brake lines is essential to keeping your vehicle in top working condition and ensuring the safety of yourself and others on the road.
Schedule regular brake system maintenance with a professional mechanic:
Regularly scheduling brake system maintenance with a professional mechanic is essential for ensuring the safety and reliability of your vehicle.
Brake systems are crucial for the safe operation of your vehicle, and any issues with the system can lead to accidents or even fatalities.
Regular brake maintenance benefits you by preventing brake failure, reducing the risk of accidents, and prolonging the lifespan of your brake system.
A professional mechanic is crucial for brake system maintenance because they have the necessary knowledge, experience, and equipment to properly diagnose and repair any issues with your brakes.
They can also recommend the right brake parts and components for your vehicle, ensuring that your brakes will work efficiently and correctly.
Trying to perform brake maintenance on your own can be dangerous and may result in more significant issues if not done correctly.
Therefore, it is important to trust a professional mechanic with your brake system maintenance to ensure the safety and reliability of your vehicle.
Frequently Asked Questions:
What are the signs that indicate that brake lines need to be changed?
To ensure your safety, look for signs of worn brake lines such as soft or spongy brakes, leaks, or frequent brake fluid top-ups. Regular brake line maintenance is important to prevent accidents and maintain your freedom on the road.
How often should brake lines be changed?
To ensure safety and prevent accidents, brake line maintenance is crucial. Regularly inspect and replace brake lines every 5-6 years. Remember, brake fluid is essential for brake system performance, so check and top off levels regularly.
Can brake lines be repaired instead of replaced?
When it comes to repairing vs replacing brake lines, it’s best to seek professional assistance. While simple repairs may be possible, it’s often safer to replace the entire line to ensure maximum brake performance and safety.
What is the cost of replacing brake lines?
Want to replace brake lines yourself? Cost estimation depends on the type of car and materials used. DIY techniques are possible but can be challenging and require proper tools and knowledge.
Is it safe to change brake lines without professional help?
Changing brake lines without professional help can be risky. Brake line replacement is a technical task that requires precision and experience. DIYers risk causing leaks, brake failure, and accidents. Consider seeking professional help for safety reasons.
Conclusion and final thoughts 💭
Congratulations! You have successfully changed your brake lines without losing any brake fluid. It is essential to keep your brake system in top condition to ensure your safety while driving.
By following the steps outlined in this guide, you have accomplished this task with precision and skill.
Remember to dispose of your old parts and brake fluid properly. It is also important to maintain your brake system regularly to prevent any potential issues.
Regularly inspecting your brake lines and checking for any signs of wear and tear will help keep your brakes in good condition.
By taking care of your brake system, you can ensure that your vehicle stops safely and efficiently every time you hit the brakes.
Latest Posts:
- 10 Best Gear Oil for Limited Slip Differentials (Reviewed!)

- Allison 1000 Transmission Fluid Type (5 Best Options!)
- 91 Octane Vs 93 Which One You Use? (The Surprising Truth!)

- Oil Pressure Gauge Not Working: (Guaranteed Fix!)
- 10 Best Transmission Fluid for 4l60e (Tested by Experts!)

- 10 Best Ceramic Coating For Wheels (Used By Real Users!)


Leave a Reply